
A Simplified Workflow for Laser Programming on Titan
As productions continue to integrate lighting and laser systems more closely, programmers are increasingly looking for ways to keep those workflows within a single console environment.
That’s where X-Laser’s Mercury system comes in.
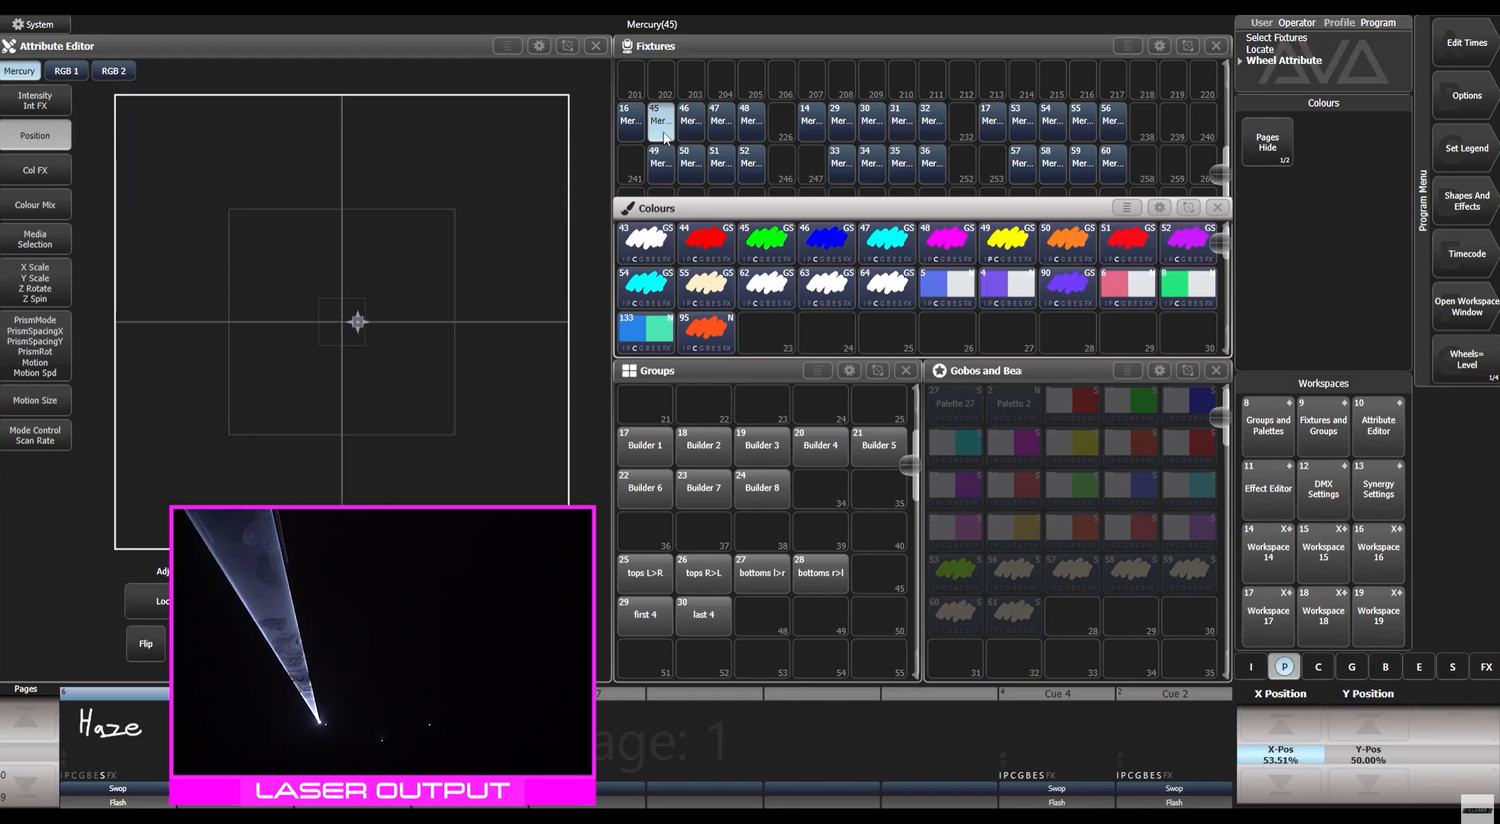
Mercury integrates directly with Avolites Titan, allowing compatible laser systems to operate alongside lighting fixtures inside the same console workflow. Programmers gain access to fixture-style controls, Builder-based effects, zoning tools, and integrated beam programming directly from the console environment.
In this tutorial walkthrough, Customer Experience Specialist Gabby from X-Laser and Elation demonstrates how to set up and program Mercury using the Basic Builder workflow inside
Avolites Titan. From patching and zoning to gobos, gradients, motion effects, and builder control, the tutorial provides a practical introduction to creating dynamic laser looks safely and efficiently.
Whether you’re new to laser programming or looking to refine your Mercury workflow on Titan, this walkthrough offers a practical look at how integrated laser control can simplify live production programming.
Why Integrated Laser Workflows Matter
In traditional setups, laser programming often happens separately from lighting programming, requiring operators to move between different software platforms during setup and show operation. Integrated workflows simplify that process by allowing lighting and laser effects to operate inside a centralized control environment.
For programmers already comfortable working in Titan, this can mean faster setup, fewer disconnected workflows, and a more cohesive programming process across lighting and laser systems.
Instead of relying on external laser software, Mercury enables compatible X-Laser projectors to operate more like intelligent lighting fixtures directly within the Titan environment.
A major part of that workflow is Mercury’s Builder system. Builders function similarly to fixture instances, allowing programmers to control multiple independent beam elements within a single projector. Instead of treating a laser as a single output source, users can build layered looks by simultaneously using multiple controllable beam instances.
In the tutorial, Gabby walks through configuring between one and eight Basic Builders per fixture, depending on available universe space and workflow needs. Once patched, Builders can be grouped, aligned, offset, and manipulated using familiar Titan programming concepts.
Mercury also includes built-in gobos, prism controls, beam effects, motion macros, gradients, and color systems that integrate directly into the Titan workflow. The tutorial demonstrates how programmers can quickly create layered aerial looks, beam spreads, Liquid Sky effects, and movement-based effects without having to manually program every beam behavior from scratch.
One especially useful feature demonstrated in the walkthrough is Mercury’s dual-color system. Each Builder includes both a primary and secondary color layer, allowing programmers to generate animated gradients and dynamic color transitions directly inside the console environment.
Gabby also demonstrates the difference between Pre and Post-Color effects. Pre effects stay locked to the beam itself, while Post effects allow the beam to move through a stationary color space, creating more dynamic movement and gradient behaviors across a projection zone.
For Titan users already familiar with fixture groups, effects generators, palettes, and movement tools, Mercury feels less like a separate laser platform and more like a flexible extension of the existing Titan workflow.
Watch the Full Mercury Avolites Titan Tutorial
In the tutorial video below, Customer Experience Specialist Gabby from X-Laser and Elation walks through the full Mercury setup and programming process using Avolites Titan.
Tutorial Highlights / Chapters
-
00:19 – Patching Fixtures & Builders
-
Gabby begins by patching Mercury Master fixtures and Basic Builders inside Titan while explaining how Builders are assigned, organized, and grouped for workflow efficiency.
-
02:38 – Zoning Setup & Safety Basics
-
The tutorial walks through enabling Builders, reducing output scale and intensity, using optimized test patterns, and safely establishing projection zones while verifying fixture boundaries.
-
06:35 – Aligning Fixtures & Builder Movement
-
Gabby demonstrates how X/Y offsets, alignment adjustments, and Builder controls can create symmetrical beam layouts and more dynamic movement across multiple fixtures.
-
08:02 – Gobos, Prism & Beam Effects
-
This section explores Mercury’s extensive gobo library along with prism controls, motion macros, beam effects, and Liquid Sky-style looks built directly inside Titan.
-
10:25 – Color Mixing & Gradient Effects
-
The walkthrough demonstrates Mercury’s dual-color workflow, animated gradients, and the difference between Pre- and Post-Color effects across moving beam patterns.
-
12:03 – Creating Effects with Titan’s Effects Engine
-
Gabby closes the tutorial by demonstrating how Titan’s effects engine can generate layered movement, spread, speed, and motion effects across multiple Builders.
-
12:48 – Final Tips & Wrap-up
-
The tutorial concludes with additional workflow tips and pointers toward more Mercury and console programming resources.
Laser Safety and Best Practices
Laser safety should always remain part of the programming workflow, especially during zoning, alignment, and effect creation. Throughout the tutorial, Gabby demonstrates several practical safety measures, including scaling the output down during setup, using optimized test patterns, and verifying projection boundaries before moving on to more advanced programming.
The tutorial also emphasizes checking for reflective surfaces, such as mirrors, windows, cameras, and other objects, that could unintentionally redirect the laser output.
Mercury’s zoning workflow helps programmers establish safe operating boundaries directly inside the Titan environment while preventing Builders from projecting outside approved zones during operation.
Starting with reduced intensity levels and controlled test patterns makes it easier to safely verify projection areas before building larger aerial looks and dynamic movement effects.
For additional guidance on safe and compliant laser operation, X-Laser provides several training and educational resources:
- Laser Safety Basics
- X-Laser User Information & Safety Resources
- Product Manuals & Documentation
Operators should always follow local regulations, manufacturer guidelines, and professional laser safety procedures when deploying laser systems in live production environments.
Additional Resources
For users looking to continue building their Mercury workflow, X-Laser offers additional downloads, tutorials, and support resources for Avolites Titan and other major lighting control platforms.
- Mercury Profile Downloads & Support
- X-Laser Tutorials & Videos
- Product Manuals & Documentation
- X-Laser User Information & Safety Resources
X-Laser also provides walkthroughs for additional console environments, giving programmers multiple ways to integrate Mercury into existing production workflows.


