
A Faster Workflow for Laser Programming in grandMA3
For many lighting programmers, integrating lasers into a live production workflow can still feel like working with alien technology. Traditional laser control often involves additional software, disconnected workflows, and extra setup considerations, which can complicate show programming and operation.
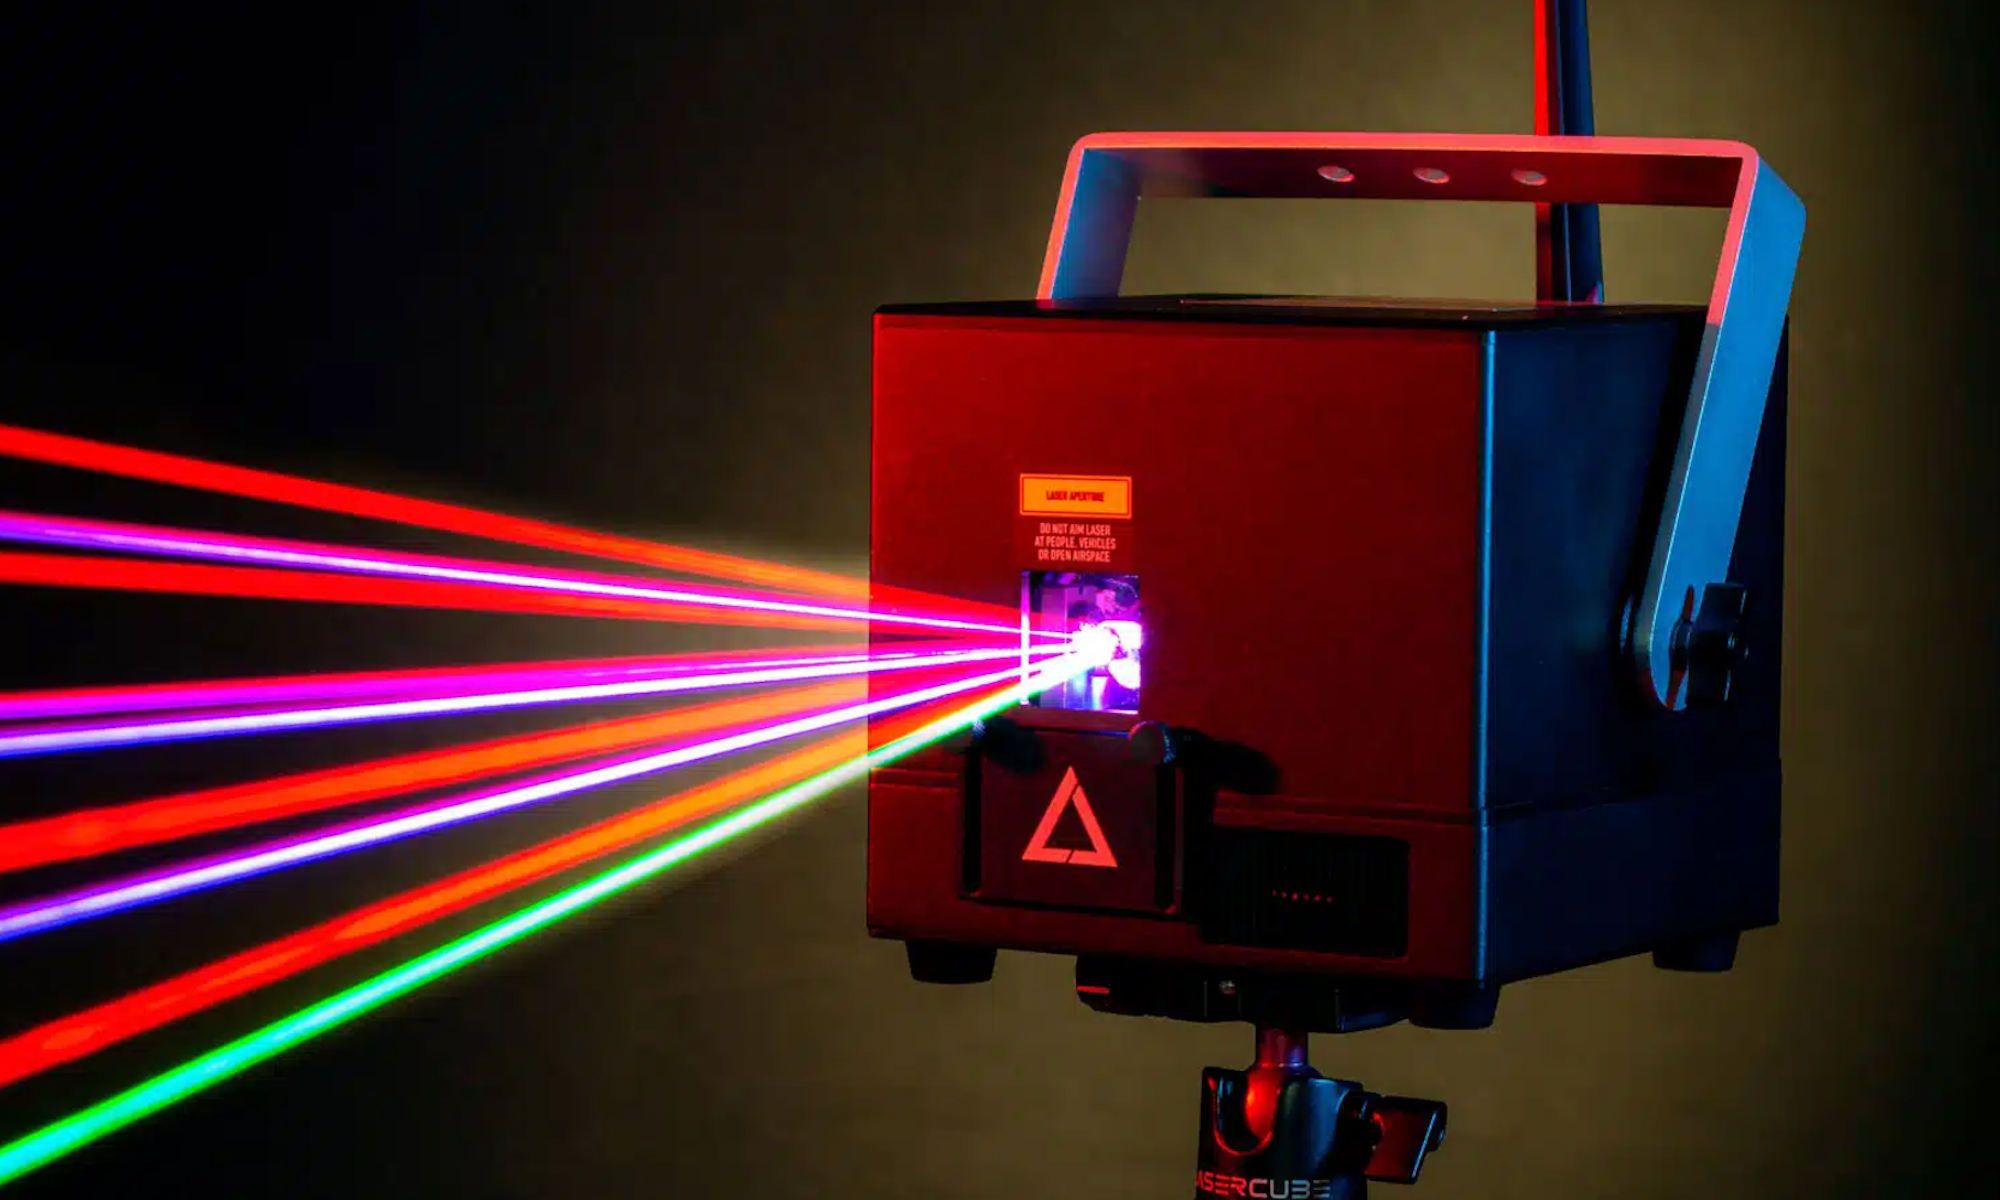
But as integrated lighting and laser workflows become more common across touring productions, festivals, and live events, programmers are increasingly looking for ways to keep those systems working together inside a unified control environment. Thankfully, that’s where X-Laser’s Mercury system comes in.
Mercury allows compatible X-Laser projectors to be patched and programmed directly inside grandMA3, giving programmers access to fixture-style workflows, Builder-based effects, zoning tools, and integrated beam control from within the console itself.
In this tutorial walkthrough, we’ll cover the Mercury workflow on industry-standard grandMA3, from patching and zoning to gradients, beam effects, and advanced multi-Builder programming techniques. We’ll also highlight practical setup strategies and safety considerations that will help make laser programming more approachable for MA3 users.
Whether you’re new to console-based laser control or looking to streamline an existing workflow, this walkthrough offers a practical look at how Mercury integrates into the grandMA3 ecosystem.
Why Integrated Laser Workflows Matter
Having an integrated workflow simplifies that process by allowing lighting and laser effects to operate inside a centralized programming environment. For programmers already comfortable working on a grandMA3, this means faster setup, fewer disconnected workflows, and a more cohesive programming session across lighting and laser systems.
For those already familiar with fixture-based programming, Mercury reduces the need to learn an entirely separate laser control workflow. Instead, programmers can build laser looks using many of the same tools and concepts already used throughout live show programming.
Inside MA3, programmers can work with parameters for positioning, dimming, gobos, color, prism behavior, beam effects, zoning, and motion-based effects directly from the console.
A major part of the workflow is Mercury’s Builder system. Builders function similarly to fixture instances, allowing multiple independent beam elements to be controlled within a single projector. Instead of programming a laser as a single output source, programmers can create layered looks by simultaneously controlling multiple beam instances.
Using standard MA3 tools like Align and Fan, Builders can be distributed across a zone to create gradients, aerial looks, beam spreads, and motion effects without having to build each effect from scratch.
Mercury also includes integrated color gradients, wave parameters, gobos, prism controls, and beam effects that work directly inside the MA3 workflow. In the tutorial, Gabby demonstrates how Pre- and Post-Prism effects change the relationship between movement and color behavior, allowing gradients and beam motion to interact dynamically across the projection zone.
One example highlighted in the walkthrough is the creation of classic Liquid Sky effects using large line gobos, wave parameters, prism behavior, and multiple Builders. By combining these tools, programmers can generate expansive aerial looks with relatively minimal setup.
Watch the Full Mercury grandMA3 Tutorial
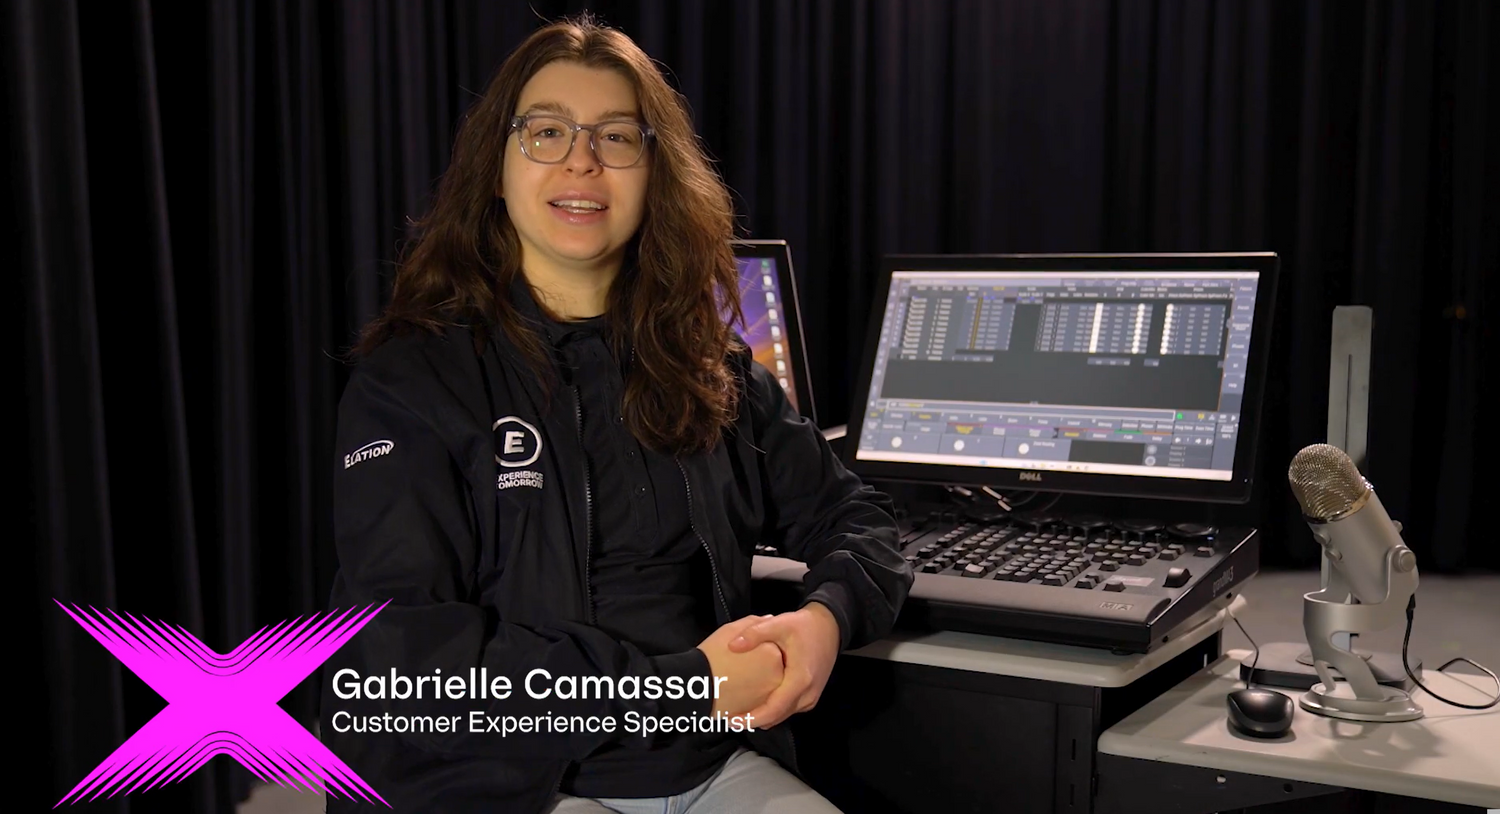
In the tutorial video below, Customer Experience Specialist Gabby from X-Laser and Elation walks through the full Mercury setup and programming process in grandMA3.
Viewers will learn how to patch and zone Mercury fixtures, work with Builders, create beam and color effects, and generate layered aerial looks using familiar MA3 programming tools.
Tutorial Highlights / Chapters
00:45 – Patching the Master Fixture
Gabby begins by patching the Mercury Master fixture and explaining how Builders function inside the MA3 patch environment.
01:38 – Zoning Setup & Safety Basics
The tutorial walks through creating projection zones, using test patterns, safely scaling the output, and verifying projection boundaries before programming effects.
03:25 – Understanding Builders & Beam Control
Gabby introduces the Builder workflow, including beam positioning, gobos, prism behavior, focus adjustments, and how Builders function as independent beam instances within a single projector.
05:36 – Color Modes & Gradients
This section explores Mercury’s built-in color maps and gradient systems, including how Main and Secondary color channels interact to create dynamic beam looks.
06:38 – Pre vs. Post Prism Effects
Gabby demonstrates how Pre- and Post-Prism modes change the relationship between movement and color behavior across a projection zone.
07:52 – Creating Liquid Sky Effects
Using wave parameters, large line gobos, prism behavior, and multiple Builders, the tutorial demonstrates how to create classic Liquid Sky-style aerial looks.
08:44 – Using Multiple Builders
Later sections focus on advanced multi-Builder workflows, including layered beam looks and more complex programming techniques.
09:27 – Aligning & Fanning Builders
Gabby shows how standard MA3 tools like Align and Fan can quickly spread Builders across a zone to create larger layered effects and motion-based looks.
10:09 – Advanced Builder Effects
The walkthrough closes with additional Builder programming techniques and advanced effect combinations.
11:06 – Final Thoughts
Gabby wraps up the tutorial with additional programming tips and points viewers toward more Mercury tutorials and X-Laser resources.
Laser Safety and Best Practices
Laser safety is, and should always be, part of the programming workflow, especially when setting up projection zones and testing new effects. Throughout the tutorial, Gabby demonstrates practical safety measures, including scaling down the output during setup, using test patterns for zoning, and verifying projection boundaries before programming more advanced looks.
The zoning workflow built into Mercury helps programmers verify projection boundaries directly inside the MA3 environment while keeping output contained within defined projection areas. The tutorial also emphasizes checking for reflective surfaces, such as mirrors, windows, cameras, and other objects, that could unintentionally redirect the laser output.
Starting with reduced output levels and simple test patterns makes it easier to safely verify projection boundaries before moving into more advanced effects and programming workflows.
For additional guidance on safe and compliant laser operation, X-Laser provides several training and educational resources:
- Laser Safety Basics - https://www.xlaser.com/blogs/news/laser-safety-basics
- X-Laser User Information & Safety Resources - https://www.xlaser.com/pages/user-information
- Product Manuals & Documentation - https://www.xlaserlab.com/pages/download
Operators should always follow local regulations, manufacturer guidelines, and professional laser safety procedures when deploying laser systems in live production environments.
Additional Resources
For users looking to continue building their Mercury workflow, X-Laser offers additional downloads, tutorials, and support resources for grandMA3 and other major lighting control platforms.
- Mercury Profile Downloads & Support - https://xlaser.com/pages/support
- X-Laser Tutorials & Videos - https://www.youtube.com/@X-LaserUSA
- Product Manuals & Documentation - https://www.xlaserlab.com/pages/download
- X-Laser User Information & Safety Resources - https://www.xlaser.com/pages/user-information
X-Laser also provides walkthroughs for additional console environments, giving programmers multiple ways to integrate Mercury into existing production workflows.
Learn More About Mercury and Professional Laser Control
For a full walkthrough of the workflow covered in this article, be sure to watch the complete Mercury grandMA3 tutorial here (LINK) and explore X-Laser’s additional resources, downloads, and training materials for continued learning.

